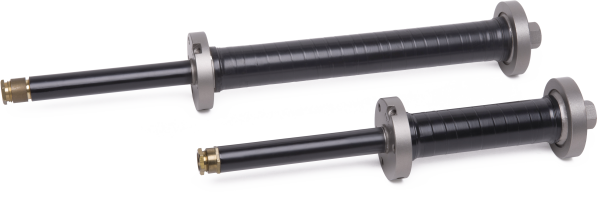
The vibrating wire extensometer for concrete, in the ECV-CS, 150/133 and 300/133 models, was designed for direct application in reinforced concrete structures where the machining actions that are carried out in the vicinity of the installed instrument can be quite heavy and invasive and where the risk of possible damage to the instrument itself during these phases is evident. This type of instrument was specifically created for applications in reinforced concrete dams. where it is necessary to satisfy two fundamental requirements: sturdiness and reliability over time.
Our extensometer was designed and built for guarantee both of these requirements, in addition to many others typical of vibrating wire sensors.
The thermal expansion coefficient of the entire instrument is very close to that one in concrete; this minimizes the disturbing effect of the temperature. The connecting cables and joints do not affect the measurements.
The connection to the measuring stations is carried out by means of a highly insulated cable, suitable for being directly buried in the concrete. Special models, with particular values of the above characteristics, are supplied on request.
- Strain Gauges
Home » Products » Strain Gauges » Vibrating Wire Extensometer For Concrete
Vibrating Wire Extensometer For Concrete

Applications
The ECV-C.S. extensometers could be applied in
- RCC and Concrete Dams
- Earth dams with inspection gallery
- Spiller, bridges and large structures in general
Features and Benefits
- High resolution and sensitivity
- Resistant, ideal for long-term monitoring
- Reliability
- Possibility to be integrated into automatic monitoring systems
- Absence of drifts
- Resistant to induced phenomena
Principle of Measuring
The instrument consists of two end flanges (A), connected by a support tube (B); the vibrating string (C) is fixed between the two heads. One of the two flanges carries a closing cap (D) to access the nut for adjusting the tension of the vibrating wire. The other flange carries the watertight terminal (E) for connecting the conductors to the measurement stations; the connection is protected by a rigid fitting (F). Both flanges have threaded holes for fixing bolts that increase anchoring and for orient the tool in the concrete mass. The excitation and the detection of the vibrations of the string are given by an electromagnet (G) whose coils constitute an electrical thermometer with variation of resistance thus also providing the temperature value. The connection to the measuring stations is carried out by means of a highly insulated cable, suitable for being directly buried in the concrete. Special models, with particular values of the above characteristics, are supplied on request.
These instruments are connected to our portable datalogger DEC 3000. A bipolar cable is used for extensometric measurements while a tripolar cable could be used if you want to perform thermometric measurements; in both cases the section of the conductors is 1 mm2 and the external diameter of the cable, which is insulated in Santoprene, is 11 mm. Various accessories are available for the installation of the extensometers to be arranged in a rosette configuration, or for the measurement of the deformations in the three orthogonal directions; vertical, horizontal and 45 ° inclined positional formwork, rods for checking the position during the casting phase, and formwork for installing the insulated strain gauge. This formwork is particular and allows you to install a strain gauge in the body of the structure without being subjected to the loads of the structure but which is only affected by the effects of the shrinkage of the concrete
Technical Features
| Measuring Base: | 150 mm o 300mm | |
| Length of the wire : | 133mm for both models | |
| Sensitivity: | 0,0%4 of the full scale | |
| Range : | 0,2mm; 0,4mm | |
| Accuracy : | : 0,2% .s. |
| Junction Panel
Selection and Measurement Panel |
Available in different models for the connection of different instruments Complete measurement panel with MUX boards for automatic selection
|
|
| Measurement Panel |
Simple measurement panel
|
|
| DEC 5 | Portable readout Unit
|
|
| DEC 3000 | Portable Datalogger | |
| CUM 3000 | Multichannel datalogger | |
| MUX | Multiplexer for connecting different sensors to the Datalogger
|
|
| Horizontal Formwork | Formwork for installing the strain gauge in a horizontal position
|
|
| Vertical Formwork | Formwork for installing the strain gauge in a vertical position
|
|
| Inclined Formwork : | Formwork for installing the strain gauge in a 45 ° inclined position
|
|
| Conical Sticks | Cylindrical bar in stainless steel for verifying the maintenance of the strain gauge of the installation direction
|
|
| Formwork for insulated | Formwork for installing the insulated strain gauge, with lid
|
|
| Cable for concrete to be embedded | 2×1 mm2 cable, Santoprene insulated with thick insulation; Dest = 11mm
|
|
| Cable for concrete and temperature to be embedded | 3x1mm2 cable, Santoprene insulated with thick insulation, Dest = 11mm
|
|
| Cast resin joint | Cast resin joint complete with two-component resin for joining instrument cables
|
